
Introduction
When you want to seed a new lawn, you’ll hear all kinds of advice from different kinds of people. All that information becomes extremely confusing. An easy way out is to outsource the seeing process by searching for “landscape companies near me” and hiring professionals for the job. Otherwise, you can do it yourself. Here’s what you need to know when seeding a new lawn.
The Details
1. Choose the time – You need to wait for the right time to plant new grass seed. For instance, if you plant perennial ryegrass, Kentucky bluegrass, or other types of cool-season grass during the summer or winter season, you’ll have a terrible time. The seeds won’t get established in the soil and even if new grass sprouts out, it wouldn’t be able to tolerate the extreme heat or cold climate.
That’s why cool-season grass needs to be planted during early fall or the spring season. On the other hand, if you have zoysia, bermudagrass, and other such warm-season grass, you need to plant them during early summer. These types of grass need warm soil for germination.
2. Choose the grass seed – While you choose a grass seed, you need to align your choice with your location, budget, and lifestyle. Think about your local climate and the type of lawn you want to grow. Does your lawn get full sun or is it partially shady? Will your lawn just be used by kids and pets, or will it encounter a lot of foot traffic? All these factors will help you choose the seed that’s best for you. For instance, if you live in the Southeastern part of the country with a warm climate and are too lazy to water the lawn, centipede grass may be the best choice for you.
3. Test and prepare the soil – If you have good soil, you can grow a green patch of grass perfectly on your property. However, if you’re not sure about the condition of your soil, it’s best to get the soil tested. You can get the soil tested for a small sum of money at the county’s cooperative extension service. The test results tell you the exact nutrients and amendment composition of the soil and what you need to add to improve the soil.
You can even do some basic soil testing by yourself. You can get an inexpensive soil testing kit from the gardening store and test its pH level. For most grass types, the soil needs to have a pH level between 6.0 and 7.0. You can add limestone if the soil is too acidic and add manure or compost if your soil is too alkaline.
Once you’ve tested the soil and improved it, it’s time to prepare the soil for the grass seeds. Use a shove; to remove existing grass. You can do the same with less effort by renting a sod cutter. After that, inspect the lawn area and remove large debris and rocks. Next, you need to fill up gaps left by large rocks with a blend of topsoil. Finally, you need to till the soil and break it down into small marble-sized particles.
4. Even out the surface – After breaking down the soil, it’s time to level it out. Get a garden rake or bow rake and use it to even out the surface as much as possible. If you encounter large debris, get rid of it. Next, you need to fill up those spots with top-quality store-bought topsoil. If you add unscreened topsoil or use soil from a different part of the property, you may invite a weed infestation.
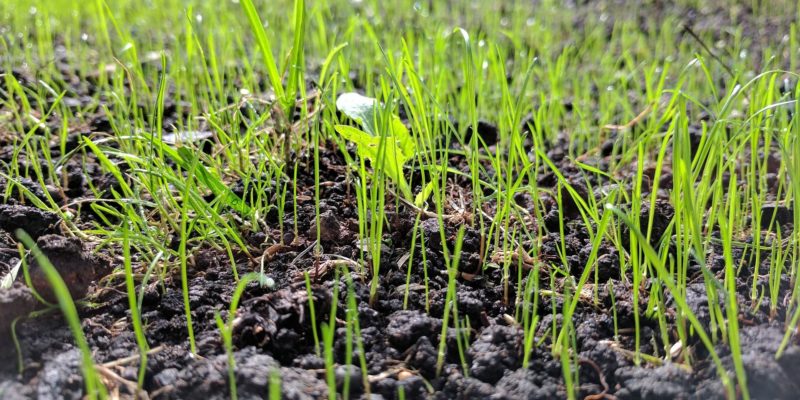
5. Seed the lawn – After the soil is prepped, it’s time to seed your new lawn. However, before you do that, you can feed good quality granular lawn food to the soil and give your seeds a head start. This way, you can seed your lawn the same day. Some of those lawn feeds also have substances that discourage weed growth for several weeks.
It’s also important to note that different types of seeds and fertilizer perform best in an optimal setting. Check the fertilizer bag and make sure that you’re using the right techniques for spreading it around. If you start with the perimeter you don’t have to worry about missing out on edges and having bald patches of lawn. When you seed the lawn, follow a mowing pattern with overlapping passes.
6. Cover it up – Once the soil is seeded, cover the seeds with a thin layer of soil. This prevents the seeds from washing away or drying out. After you spread a quarter-inch layer of soil on the seeds, pull on the soil gently with the back of a rake. After that, you can mulch the lawn with a thin layer of straw.
7. Keep watering – When it comes to watering the lawn, you need to keep the top inch of the soil moist. However, you need to be careful, since you don’t want to get it soggy. Mist the seeded section at least once a day. Increase the frequency if the weather is particularly dry and hot. When the seeds start germinating, it’s time to increase watering and keep two inches of the lawn moist.
Keep doing this till the grass reaches a mowing height of around 3 inches. After that, you can reduce the watering frequency to around twice every week. However, when the frequency is reduced, the soil needs to be moistened deeper. That means you need to soak the soil deeply up to 8 inches so that the grassroots have an incentive to spread out and reach deeper into the soil.
Conclusion
Seeding a new lawn isn’t rocket science. If you pay attention to the soil, choose the right seed, time it right, and follow the right steps, you can easily seed a new lawn. However, all of that needs a lot of patience and you need to adjust according to the changing situation. Instead, it’s easier to search for “landscape companies near me” and hire professionals for the job.


Comments