
When embarking on a kitchen remodeling project, the first step is to closely examine your existing kitchen layout. Take note of what works and what feels inconvenient. Consider the placement of appliances, countertops, and storage areas. Evaluate traffic flow and accessibility. Identifying the strengths and weaknesses of your current layout will serve as a solid foundation for making informed decisions during the remodeling process.
Moreover, your kitchen should reflect your personal style and preferences. Consider the overall look you want to achieve – whether it’s sleek and modern, cozy and traditional, or something uniquely in-between. Select color schemes, materials, and finishes that resonate with your aesthetic aspirations. Defining your design style upfront helps guide your decisions on everything from cabinetry and countertops to lighting and backsplash, ensuring a cohesive and visually appealing result.
Factors Influencing Tile Flooring Installation Time
Type of Tile
The choice of tile significantly impacts the time required for installation. Porcelain and ceramic tiles, being relatively easier to cut and lay, tend to speed up the process. On the other hand, natural stone tiles, like granite or marble, often demand more meticulous handling due to their irregularities, which can extend installation time. Opting for larger tiles can expedite installation, as they cover more space with fewer pieces, while smaller mosaic tiles might require more intricate work.
Tile Layout and Pattern
The layout and pattern chosen for the tile installation also play a role in the timeframes. Simple layouts, such as straight or diagonal patterns, generally take less time as they involve straightforward cuts and alignments. However, intricate patterns like herringbone or basketweave demand meticulous attention to detail, potentially elongating the installation process. A skilled installer’s expertise in handling complex patterns can mitigate delays and ensure precise results.
Subfloor Preparation
The condition of the subfloor beneath the tile is a crucial determinant of installation time. A level and well-prepared subfloor facilitates quicker installation, as tiles adhere more seamlessly and require fewer adjustments. In contrast, an uneven or damaged subfloor demands extra time for leveling, patching, or addressing structural issues. Adequate preparation not only expedites the installation but also ensures the longevity and quality of the finished tile floor.
Estimating Tile Flooring Installation Time
Measuring and Calculating Tile Area
Accurate measurement forms the bedrock of efficient tile flooring installation. Begin by measuring the length and width of the space to determine the total area in square feet. When calculating, don’t overlook any alcoves or recesses that might require tile installation. To account for potential wastage due to cuts, it’s prudent to order about 10% more tiles than needed. This step ensures you’re well-prepared and minimizes delays caused by last-minute tile procurement.
Considering Room Shape and Obstacles
The layout of the room and its inherent obstacles play a pivotal role in estimating tile installation time. Straightforward, open spaces generally result in quicker installations. However, irregular room shapes or areas with many nooks and corners demand more intricate cutting and fitting, which can extend the installation process. Equally important is factoring in obstacles like plumbing fixtures and cabinets that necessitate careful tile adjustments. By acknowledging these spatial complexities beforehand, you can better gauge the time needed for flawless installation.
Assessing Skill Level and Experience
Your expertise and familiarity with tile installation significantly impact the time required for the project. Seasoned DIYers or professionals might work swiftly due to their refined techniques and experience with various tile types. Conversely, novices could potentially encounter challenges that slightly elongate the installation process. It’s vital to gauge your skill level honestly and allocate time accordingly. If uncertain, setting aside extra time allows for unexpected hiccups without jeopardizing the project’s timeline.
Installation Process and Time Breakdown
Surface Prep & Layout
To begin the tile flooring installation, meticulous surface preparation and thoughtful layout are essential. This stage ensures a solid foundation for the tiles and sets the stage for the project’s success. Properly cleaning and leveling the surface guarantees that the tiles adhere seamlessly and endure over time. Precise layout planning also prevents unsightly cut tiles at the edges and corners, creating a polished and professional finish.
Tile Setting & Adhesive Application
The heart of the installation lies in the tile setting and adhesive application phase. This step demands careful attention and a skilled hand. Applying the right adhesive type and using the correct trowel size are key to ensuring optimal tile adhesion. Thoughtful tile placement guarantees uniform spacing and alignment, resulting in a visually appealing arrangement. Taking the time to make subtle adjustments during this phase will pay off in the final presentation.
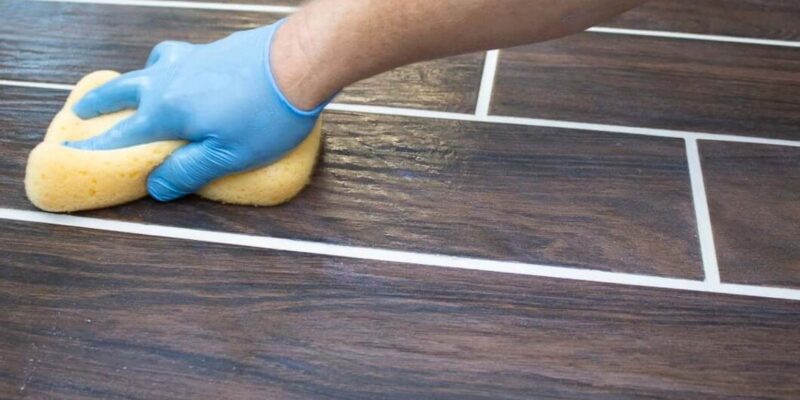
Grouting, Cleaning & Finishing Touches
As the tiles securely set in place, the focus shifts to grouting, cleaning, and the final touches. Grouting not only enhances the aesthetic by filling gaps but also reinforces the tiles’ stability. Thorough cleaning removes excess grout and adhesive, revealing the true beauty of the tiles. Finally, attention to detail in finishing touches, such as edge trims and transitions, adds finesse to the entire installation. This comprehensive approach ensures that the tile flooring not only looks impeccable but also stands the test of time.
Tips for Quick Tile Flooring Installation
Efficient Planning and Organization
To excel in tile flooring installation timelines, adept planning and meticulous organization are paramount. Start by measuring the area accurately and acquiring all necessary materials beforehand. Prepare a layout to visualize the tile placement and make efficient cuts. Clear the workspace of obstacles, ensuring a smooth workflow.
Professional Installers for Timely Results
Opting for skilled professionals holds the key to swift tile flooring installation. Their expertise brings years of experience to the table, allowing for seamless execution. Proficient installers understand the nuances of different tile types and layouts, leading to quicker and precise installations. While DIY projects might seem tempting, the proficiency of professionals ensures that the project stays on track, avoiding delays and rework.
In the realm of tile flooring installation, mastering timeframes is a blend of smart choices and skilled execution. From tile selection to layout planning, each step influences the swiftness and quality of the project. Balancing precision with efficiency ensures a floor that not only impresses aesthetically but also withstands the test of time.
Publisher’s Details:
Elite Living Construction
28062 Forbes Rd D, Laguna Niguel, CA 92677
(866) 451-1995
elitelivingconstruction.com
info@elitelivingconstruction.com
Incorporating different types of flooring, such as wood flooring, can significantly impact your tile installation timeline. If you’re considering the benefits of wood flooring, Elite Living Construction’s blog post on “Benefits Of Choosing Wood Flooring” can provide valuable insights. If you’re in need of exceptional home remodeling services in Irvine, CA, trust Elite Living Construction for the best results.


Comments